Powered by Blogger.
  • Home
  • About
Instagram Bloglovin' Tumblr Email

Laine's Blog

Hylamide HA Blur Primer

I've been interested in Deciem's various brands and products ever since their stores started popping up in Toronto so I'm super excited to finally be testing my first Hylamide product! Recently I saw that this primer was on sale because it had won some award for best primer so I decided it was the perfect time to try it. I'm not a regular primer wearer because I haven't found one that I really like yet and unfortunately, I don't love this one either.

Hylamide HA Blur Primer

This product is called a "prismatic blurring surface hydrator" but from what I can tell and what the sales rep in the store said, it's essentially just a pore blurring foundation primer. The texture is the standard silicone-y primer feeling that dries to a powdery finish.

The directions on the back say: Apply under or over liquid foundation. Can also be used without makeup. When I was in the store, the sales rep told me that it can also be mixed in with liquid foundation (this is also stated on their website). The website also says that powder products should be applied on top of the HA Blur.

The Claims (from the Hylamide website):
  • Blurs
  • Minimizes pores
  • Hydrates
  • Plumps 
The unique feature of this primer is that it uses hyaluronic acid powder as the blurring agent. This is supposed to make it compatible with all skin types (even dry skin) and all makeup. But note that this primer still has a lot of silicones in it, and in my opinion behaves similarly to other silicone primers.

Before I get into the review, I should mention that my skin is combination and sensitive. I get oily throughout the day but I also have dry patches around my nose and on my cheeks. This makes it hard for me to find face products that work because they need to be mattifying enough to control oil but also hydrating enough to not emphasize my dry spots.

I first decided to test this out on its own, without using any makeup. Here is a before and after:

Before primer
Before HA Blur. I only have moisturizer on.
After primer
After HA Blur.
In my opinion, this primer didn't blur or minimize the appearance of my pores. But it did mattify and smooth out my skin. You can see that in the after picture, my nose and cheek is less shiny. When skin is matte, skin can look less textured and pores can look less noticeable. I do think the primer is hydrating and did a good job smoothing over dry spots. I've used it several times on its own and I do like the effect it gives and it feels nice on the skin.

Unfortunately, this product is all downhill from here. After liking it on its own, I decided to test it mixed with and under foundation. I didn't test it over foundation because I would never rub another product on top of my foundation since that would move the makeup around and make it look patchy. 

I mixed it with the Kat Von D Lock-It Tattoo Foundation, which is one of the foundations I use regularly. I apply all foundations with a beauty blender type sponge because I find that fingers or brushes always leave streaks and emphasize dry areas. 

Primer mixed with foundation
HA Blur mixed with Kat Von D foundation.
This is what it looked like after I had mixed it. As you can see, the primer gave the liquid foundation a mousse-like texture. I applied it with a damp sponge like I normally would and here are the results:

primer mixed with foundation

The first thing I noticed is that this primer emphasized the dry spots on my cheek. It kind of clumped up around these areas and made my foundation look very patchy. The primer mixed in also made my foundation very hard to apply because it would stick to the sponge but not transfer onto my skin. It looked ok from a normal distance but it looked significantly worse than just using the foundation on its own.

Next I decided to use it under my foundation like a traditional primer. I am using the Kat Von D foundation here as well. 

primer under foundation

primer under foundation

primer under foundation

As you can see, it was a disaster. The primer under my foundation made my skin look incredibly dry and the makeup clung to every bit of dry skin. It looked especially bad around my nose and upper lip. These pictures were taken after a lot of blending and trying my best to make it work.

As a reference, this is what my foundation usually looks like without any primers:


In conclusion, I like the HA Blur when used on its own. It mattifies and smooths skin without making it feel dry. But I hate the way the product works when mixed with or used under foundation. It made my foundation look patchy and clumpy and emphasized dryness. This primer might work better with other foundations or with a different skin type but personally it did not work for me.


Share
Tweet
Pin
Share
No comments
party food

Recently it was my birthday and I celebrated by having a barbecue in my friend's back yard. Normally I don't plan anything for my birthday because that is a lot of work. But this year I decided I was going to have a birthday party. It was initially supposed to be a tea party but I forgot the tea.

The older I get, the less exciting my birthday is. But I wanted to see my friends all at the same time so birthday parties still have a function in adulthood. I wish I had a nice picture of me on this momentous occasion to show you but unfortunately I looked strange in all the photos.

I'm going to keep this short and sweet. It was a really nice time and now I'm one year older and here is a nice picture of my friends:

my friends


Share
Tweet
Pin
Share
No comments
Miami Beach
Miami/South Beach
So two weeks ago I went on my very first cruise. It was also my first time in the Caribbean. I used to think I didn't like typical hot vacation destinations but there is something magical about just laying in the sand by the beach all day and not having to think about anything. Your mind is kind of just occupied with thinking about how unbelievably hot it is.

The first part of getting on this cruise was flying down to Miami. We stayed in downtown Miami, thinking it would be the busy and fun part of the city, like how downtown Toronto is the fun part. But we were wrong and it turns out downtown Miami is very quiet and boring. So we Ubered down to South Beach. South Beach is amazing. It's exactly like the Miami you see on CSI: Miami (minus the crime scene investigation of course).

Me at the Hotel Pool
At the hotel pool

miami beach
Me, chilling at the beach
giant mojito
Happy hour by the beach. Drinks the size of my face!
dinner by the beach
Dinner at The Pelican Hotel. The best thing about warm weather is the patios.
After chilling on South Beach, I decided I liked Miami after all. The next day we went to the port and got on the cruise. The cruise went to Nassau, Coco Cay, and Key West. This cruise gave me the opportunity to finally wear all the cute summer dresses I've been stockpiling.

in Nassau
In Nassau.
Coco Cay nature trail
Nature trail in Coco Cay.
fancy dinner night
Fancy dinner night on the ship.
Remember from my last post how I packed all that makeup? Yeah, I only wore makeup this one night lol. I thought this window looked cool but it actually just looks like I'm about to climb into a giant washing machine.

Hammock in Coco Cay
Sitting in a hammock, a classic vacation activity.
hammock
A stranger saw me struggling to get on the hammock and helped me out lol.
coco cay beach
Coco Cay beach. This is the day I got very sunburnt. But it was worth it.
One of the coolest things I did on this cruise was go parasailing in Key West. Now, I don't do a lot of cool things so this was definitely up there on the list of coolest things I've ever done. I once saw a video of a guy flying through the air during a storm after his parasailing rope got cut. I wanted to go parasailing ever since.

parasailing in Key West
Me and my brother being cool.
parasailing
This is the closest I will ever get to straight up flying.
And that pretty much wraps up the trip. Turns out I like tropical vacations and cruises are pretty fun.

Now here's a picture of me drinking a pina colada out of an actual pineapple to end off the post.

drinking a pina colada out of a pineapple


Share
Tweet
Pin
Share
2 comments

Makeup bag contents

If you've ever wondered what's in my makeup bag, I'm going to tell you! I hate packing and the most stressful part of packing is always packing my makeup/skincare bag. Because I hate checking in luggage, I never do it. So that means anything liquid I carry must be 100ml or less. And of course, most of my regular skin care is 118ml. Of course. 

When I pack, my goal is always to pack as little as possible. I would like to think that I am a light packer but there are some things I just need, you feel me?

Travel Makeup

After much deliberation, these are the products I have deemed essential. Since I'm going somewhere tropical (AKA hot as all hell), I don't plan on wearing much makeup. But I still have to be prepared in case I need to look attractive.

The Makeup Lineup:
  • Maybelline The Nudes Eyeshadow Palette
  • Makeup Forever Mat Velvet Foundation 
  • Essence I <3 Stage Eyeshadow Primer 
  • Estee Lauder Sumptuous Extreme Mascara
  • Estee Lauder Pure Color Gloss Mini
  • Marcelle Translucent Loose Powder (in the Shiseido jar) 
  • Anastasia Dipbrow Pomade 
  • Kat Von D Tattoo Liner Mini
  • Smashbox Lipstick Mini
  • Makeup Forever Lipstick Mini
  • Essence Silky Touch Blush 
I've traveled with most of these items before and they are my most trusted so they made the cut. The Maybelline palette is nice because it's neutral and has both mattes and shimmers. The foundation is very long-wearing and works well for my skin and dipbrow is my lifeblood.

Travel Skincare

The Skincare Lineup:
  • Cetaphil Moisturizing Lotion 
  • Cetaphil Gentle Skin Cleanser  
  • Coppertone Clearly Sheer Face Sunscreen SPF 50 
  • Bioderma Sensibio Micellar Water 
I was initially going to put my regular skincare in little travel containers but then I went to Walmart and they had these Cetaphil minis so I decided to try them out. I've tested them and they are very similar to the Cerave cleanser and moisturizer that I normally use so this saves me the trouble.

Sunscreen is absolutely essential, especially when traveling somewhere hot and sunny. Some face makeup does have SPF but it's not enough because you don't apply nearly enough makeup for the SPF to be effective. So make sure to pack a dedicated face sunscreen. I've been using this one for a few weeks and I like it. It's matte, smells nice, and doesn't make my face too oily throughout the day.

Micellar water is one of the best things to have ever happened to my skincare routine. I use it to cleanse, tone, remove makeup, do my taxes, etc. It's such a good multi-tasker. Some products that claim to do more than 1 thing actually suck at doing all the things but this is a true do-it-all product. I highly recommend. I don't think the Bioderma one is better than the cheaper options but Shopper's Drug Mart sells these mini Biodermas so it's great for travel.

Tips for packing your travel makeup bag:
  • Pack only what you will actually use every day/night; skip the weekly treatments or extra unnecessary stuff.
  • Pack products that you trust. This is not the time to test out new products that may not work for you.
  • Go to Sephora or the drug store and see if you can find mini versions of products you use. Sephora, Shopper's Drug Mart, and Walmart have a ton of makeup and skincare minis that will make your life so much easier. 
  • Only pack products with secure packaging. The last thing you need is your lotion or loose powder exploding all over your bag. 
  • For makeup applicators, try to bring small compact travel brushes or one-time use sponges. This way you don't have to worry about washing brushes. 
Happy traveling!

Share
Tweet
Pin
Share
4 comments

Tidy Vanity

If you have been keeping up with my minimalism journey, then you would have known that I am in the process of decluttering and organizing my room (and hopefully life). This was no easy feat as I have a lot of things and stuff but I am happy to say that I have made progress. A minimalist life may just be possible for me after all. 

The Life Changing Magic of Tidying Up

The first thing I did after making the commitment was to read The Life-Changing Magic of Tidying Up by Marie Kondo. In this book, she talks about the "KonMari" method of tidying up, which is basically throwing away everything that doesn't bring you joy. I wasn't quite able to throw away everything that didn't bring me joy. I insisted on keeping some things that made me miserable because I don't need too much joy in my life. Life is about balance after all. 

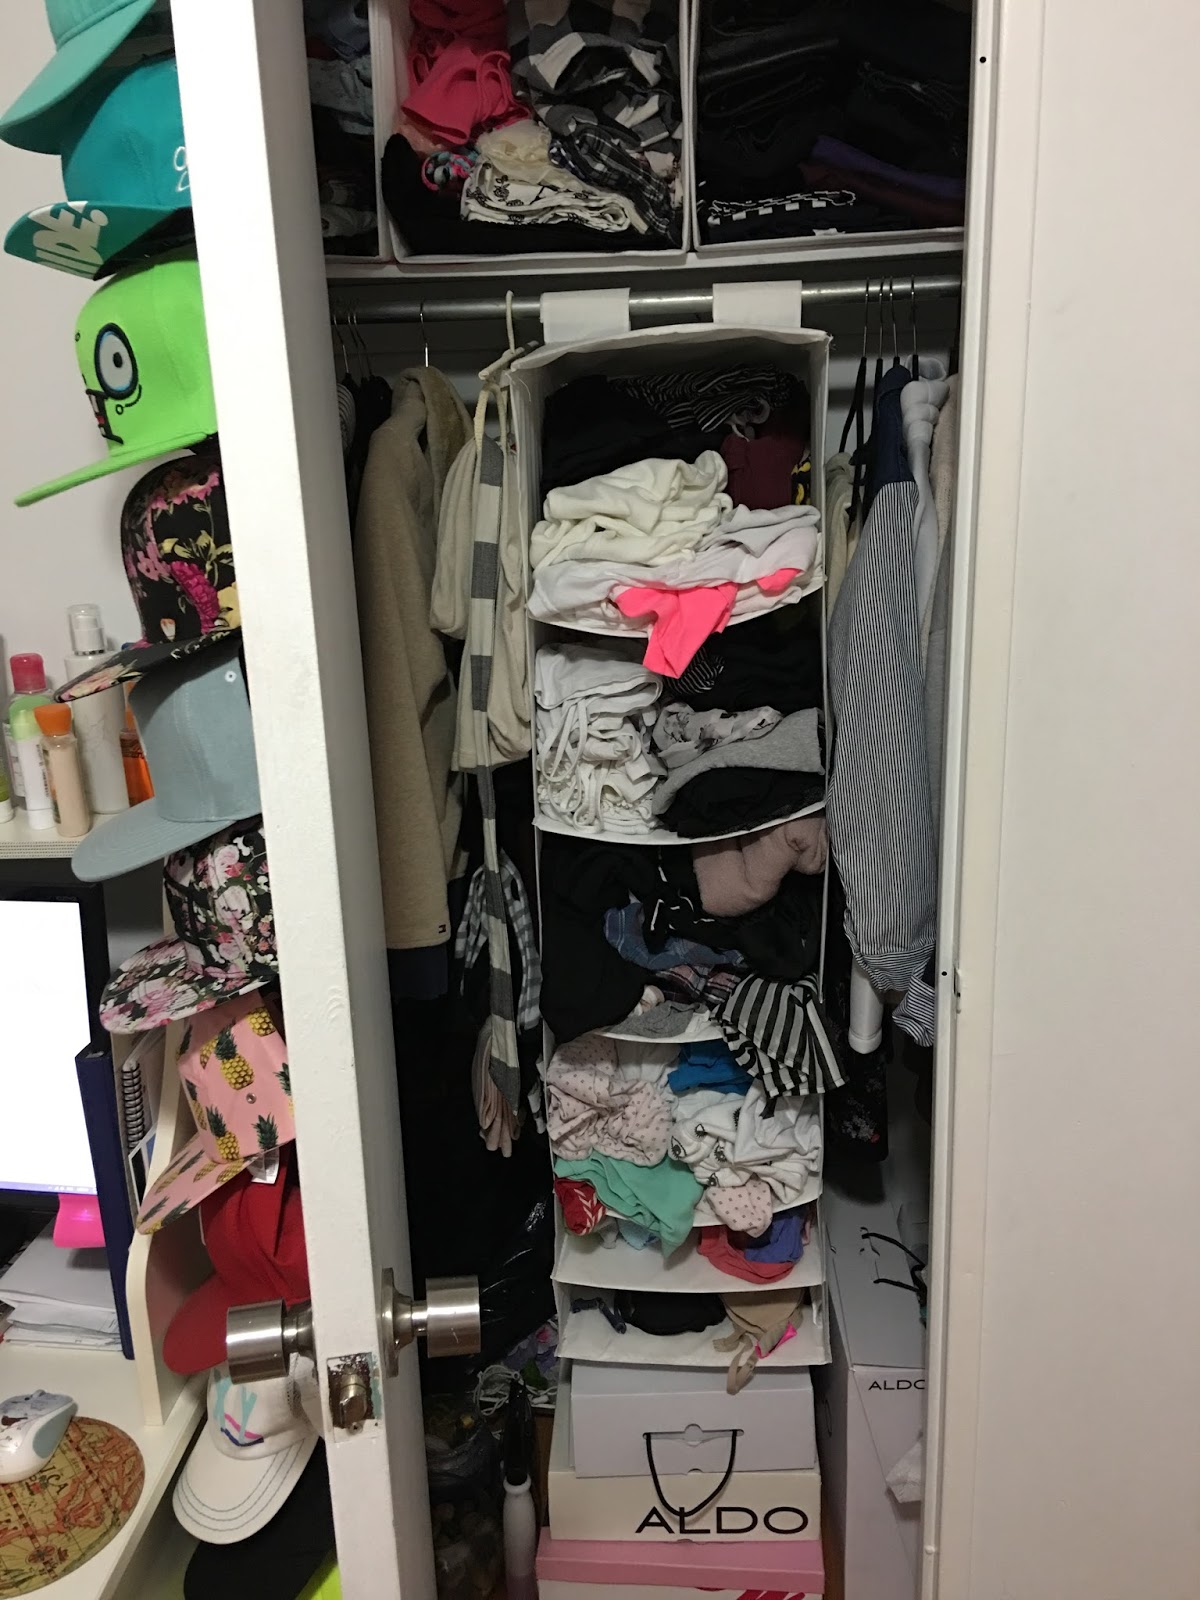
My closet

The first thing I tackled was my closet. Believe it or not, this is my closet after some major tidying and decluttering. I got rid of 2 giant bags of clothes that did not bring me joy and reorganized my closet by color. Or at least I tried to. 

Sock organization

The book also suggested storing socks rolled up and vertical in boxes so I gift wrapped 2 shoe boxes and did that, in the hopes of changing my life. 

Tidy Desk

The next order of business was my desk. My desk is both too large and never large enough at the exact same time Yeah, I don't know either. Using those David's Tea tins as pencil holders was a great idea though. 

Tidy vanity

And of course, my vanity. The bane of my minimalist existence. I threw out as much makeup as my heart could handle but I insisted on keeping all my blue lipsticks that I never wear. Sometimes you just gotta do the best you can and let Jesus take the wheel. This might not look very tidy to you but I assure you it is a vast improvement. 

Now some before and afters:

Before and after of my bookshelf

before and after of my closet

before and after of my clothes rack

before and after of my vanity

See? Told you it was a vast improvement. I am fairly proud of myself. It's been a few weeks since I tidied and I am proud to say that my room still looks the same. I plan to continue decluttering and tidying until my room is just a blank box of nothingness. Just kidding. But I do want to downsize my giant mass of belongings so that I am only surrounded by things that I really like. This means no more hoarding, buying new things only if I really love them, and throwing away things that are no longer useful. 

Welcome to the new (tidier) chapter of my life. Woohoo. 


Share
Tweet
Pin
Share
2 comments
Nordstrom Warehouse Sale

On Good Friday, I celebrated by going shopping at the Nordstrom Warehouse Sale at the International Center. This is a sale that happens annually at a giant convention center. Nordstroms have been popping up in Canada within the past few years so I figured I would go check it out for the first time. I've been to other warehouse sales before that weren't that great so I wasn't expecting much but I had a surprisingly satisfying experience.

What I Got

Phillip Lim dress

Phillip Lim dress

The pictures don't really do this dress any justice but it's a beautiful silk/velvet kimono-esque dress. It kind of looks like you're wearing several layers of robes and the top layer has fallen off your shoulder to reveal the layer underneath it.

Brand: Phillip Lim
Original Price: $1300 (note that all prices are in CAD)
Sale Price: $299


Storee shirt

I only got the blouse at the sale (skirt is from Brandy Melville).

Brand: Storee
Original Price: unknown
Sale Price: $30


Madewell blazer

They had like a dozen of this blazer in size 6 which doesn't fit me and I was so bummed out but then I found the last one in my size and I was a happy camper. It's a structured not-quite-velvet-not-quite-suede blazer with no lapels. Literally perfect.

Brand: Madewell
Original Price: ~$200
Sale Price: $50


Chelsea 28 cape

I've been watching Riverdale on Netflix and Veronica became my style icon when she walked into Pop's Chock'lit Shoppe with a cape on and now I have one too.

Brand: Chelsea 28
Original Price: $158
Sale Price: $50 

Shoutout to my amateur photographer Sandra for squatting to take these pictures.
 
What to Expect

First off, it very much is a warehouse sale so don't expect neat rows of clothes all sorted nicely. It was pretty chaotic. The sale is open for a week and I went near the end of the week but it was still packed full of people. The paper signs saying things like "Women's Tops S/M/L" indicated that they had tried to sort the clothing but honestly the effort was in vain.

Designer Section

Bags


Shoes

There. Was. So. Much. Stuff. Often times you would find the same item in several different places so it's worth looking around all the sections if you can't find something in your size the first time. The clothing was not sorted by size and only vaguely sorted by type. There were all types of clothes, shoes, accessories, bags, jewelry, menswear, and children's clothing. There was also a "Designer Room" that had luxury brands and the things in this section were more expensive.

I was pretty disappointed with the handbag selection since I was hoping to find a cute going out bag. I'm guessing there were more bags at the beginning of the sale. The stuff in the Designer Room started at $100 and went up. Stuff in the regular section started at around $20 and went up to $100.

Shopping Tips
  • Take your time and go through all the racks. Nothing is in order so you'll miss out on cute stuff if you only go through one section. 
  • Don't bring a large bag or a jacket. You'll probably be holding clothes as you shop so a big bag gets in the way and it's very hot in the convention center. 
  • Don't buy things that aren't really on sale. Most of the stuff was at a decent discount but some things were only $10-$30 off. You're at a warehouse sale to get a good discount so leave the almost regular priced stuff to regular shopping. 
  • Go to the Designer Room first. This section is way smaller than the rest of the sale and had nicer things so check it out first. 
  • Don't buy something unless you really love it. Sometimes the sale is too good and we are tempted to buy something just because it's cheap. Trust me, this is never worth it. 
  • Bring a friend who is just as into shopping as you are. I imagine it would get really boring going through countless racks of clothes all by yourself. 
Overall, a pretty neat sale.

Share
Tweet
Pin
Share
3 comments

Vanity Clutter
My vanity is an absolute disaster and it brings me great shame every day.
When I first heard about the idea of minimalism, I admit that I thought it was kind of stupid. I thought: why would people not want stuff? Stuff is great! I think in the past, I associated stuff with happiness and that resulted in buying and hoarding a ton of random things that I don't particularly like or have a use for. In retrospect, I don't think any happiness was derived from having stuff; but rather I was using stuff as a distraction from unhappiness.

Recently, all this stuff in my life has made me feel really anxious and I think I'm finally ready to get rid of most of it. I suppose this is what people call a "lifestyle change". Like becoming a vegan or a Scientologist or something. I am anticipating a profound catharsis from this purge and I am kind of excited.

I felt great immediately after making the decision that I will declutter but about 2 seconds later, I realized the sheer enormity of this task.

closet
I swear I didn't do this.
I. HAVE. SO. MUCH. STUFF.

I have no idea how this happened but somehow, throughout my lifetime I have accumulated an amazing amount of stuff. I have so much makeup, clothes, hats, stuffed animals, lotions, random papers, aflljadflas;dlfjasdl;f.

But I'm committed to this now. I am going to get rid of the things I don't like or don't use, I am going to keep my room more organized, and I am going to be aesthetic and minimalist like all the cool people on Instagram. I have dubbed this whole thing >>> PROJECT MINIMALISM <<<

The Game Plan:

The Vanity:
- Get rid of all the makeup and skincare that I haven't used since 2010
- Buy cute trays and holders to store my essentials
- Fit more stuff into the drawer to clear the tabletop

The Bookshelf:
- Get rid of all the hats and scarves I don't like
- Find room for my necklaces inside the vanity drawer
- Find another spot for my hair stuff
- Put some of my favorite books in there

The Closet:
- Donate/throw out clothes I don't like or wear
- Reorganize my clothes by color
- Store my caps somewhere out of sight

The Desk:
- Clear out all the loose random papers
- Clear out the top shelf (like why do I keep lotions here??)
- Put the books on my bookshelf

Bookshelf
Why do bad things happen to good people?
Hopefully by the end of this journey, I will have shinier hair, a successful career, a healthier diet, and 20/20 vision. But we'll see.

Share
Tweet
Pin
Share
No comments
Newer Posts
Older Posts

About me

About Me

Hi. My name is Laine and this is my blog about things that I like. Thanks for stopping by!

Follow Me

  • Instagram
  • Bloglovin'
  • Tumblr

recent posts

Categories

  • Beauty
  • Event
  • Fashion
  • Haul
  • Lifestyle
  • Makeup
  • Minimalism
  • Organization
  • Review
  • Skincare
  • Swatches
  • Travel

Blog Archive

  • ▼  2018 (1)
    • ▼  January (1)
      • 2017 in Review
  • ►  2017 (9)
    • ►  September (1)
    • ►  July (1)
    • ►  June (2)
    • ►  May (2)
    • ►  April (1)
    • ►  March (1)
    • ►  February (1)

Created with by ThemeXpose